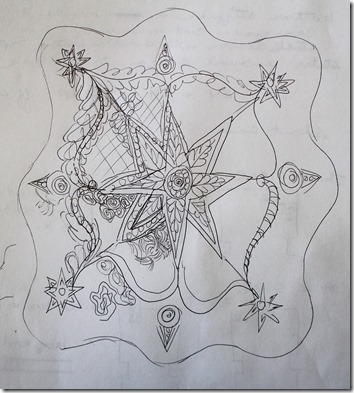
Ever wondered how I design, well here is your chance to find out. This was my initial sketch of the idea I had for a whole cloth silk quilt. Rather messy to lay the least!

After that initial idea I then drafted the Mariner’s Compass star on a oval shape marked with equal divisions to make it easier to draw. After drafting it several times and drawing the feathers in the sections several times I pretty much had the center section designed but decided to tweak it a bit more but I didn’t want to keep drawing the feathers over again so cut out the parts I wanted to save that were drawn on white paper. These were glued down to a large piece of newsprint where additional lines were drawn and that saved e a lot of time. The two types of paper is why it sort of looks like a spider web.

Next I wanted a feathered border and that got drawn several times too, tweaking it a bit here and there. The border started the same way with initial lines drawn, feathered, then mirror imaged. I used my window to do the mirror image drawing rather than getting out my light box. This design was drawn and redrawn to add more curves, changing curves, etc. then traced to the newsprint.
By the way I have an end roll of newsprint I got from our local newspaper office. The paper left on these rolls is not enough to go through the printing presses for the printing of the newspaper. They either sell them for low cost or give them away at the newspaper offices around here so check out your area newspaper if you are interested in getting a roll. Each roll has quite a bit of paper left on it and is great for designing and anything else where I need large paper. I have lso agotten rolls for my grandchildren to use for their art and craft projects and they love it.

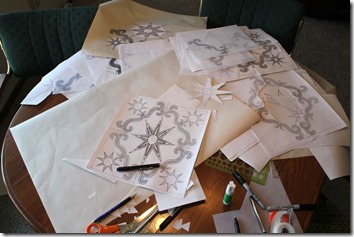
After getting one quarter of the border designed I scanned and printed it several times and taped it together with the center design then more copies were made. As you can see from the scraps on the table I did a lot of cutting and taping. Since this is a miniature I could do this but it might be a little more difficult to do a larger quilt this way. Maybe not quite so much tweaking.

Piles and piles of adjustments and changes trying to perfect my design. Each tweak trying to make it better in my eyes.
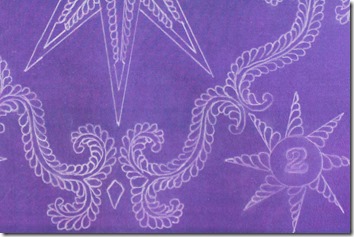
The finished design traced onto the purple silk fabric. I used a piece of Plexiglas with a light under it to do the tracing. I used
Fons and Porter white chalk like pencil. I love it as I can get a thin line that stays on pretty well and either brushes off or erases easily.

I put my monogram in the center of the center feathered star then decided to add the year I started this quilt to the 4 smaller corner compass blocks
Next installment - the quilting!
Lynn

 I tried something new to help grip the quilt under the needle and move it smoothly. I like Machinigers gloves but this worked pretty well too as it was easy to readjust and still have use of my fingers to grab threads. I cut two pieces about the size of my palm from rubberized shelf liner - you know the stuff you put on the shelves in the cupboards. This worked very well and easy to reposition for quilting a new area.


