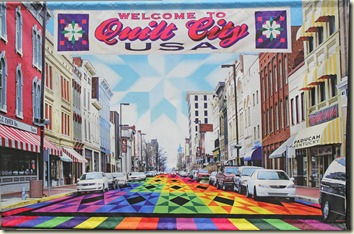
It has been a week since I got home from my annual trek to Paducah for the AQS show with my sisters and friend. I repeat from years past…it was a great experience with absolutely beautiful quilts and great shopping at the vendors booths.
Check out this
AQS web page to see the winning quilts. Just click on Paducah in the 2012 column to see the quilts but you can also look at other show winners from several years from links on that site too. I would love to post photos that I took here on my blog but with all the litigation going on in the quilt world these days I decided to not post any of the photos. I am so very sorry.
Be sure to check out the winners on the video on th AQS webpage but you could also Google the winner’s names to find websites for them and maybe they have more photos to show of their beautiful quilts. The video is good but doesn’t show the details that make these quilts the winners they were and that is sad that I can’t share my photos.
I felt the winning quilts well deserved the honors and prizes they won and I was especially thrilled that a fellow Nebraskan, Judy Woodworth, won the APQS Longarm Machine award. Her black fabric quilt is just covered with colored thread quilting, making it look like it has applique. Congratulations Judy!
There were a lot of familiar names on the quilts as well as lots of new names to me anyway. I never have enough time to really study all the quilts. Would be nice to be able to take another look at them all now a week later. The funny thing is when looking through my photos or the show book I could almost swear I had not seen some of them. How can that be? I guess the brain doesn’t always remember what the eye sees.
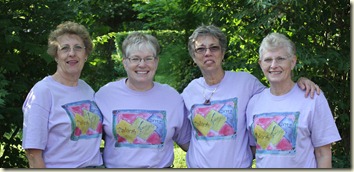
We all purchased t-shirts alike again this year and took our annual photo wearing the shirt of the year. The center of the design is always the same but the words/writing around it is different each year. I do wish the makers of the shirts would choose some different colors as this lavender was used 2 years ago. We all agreed that a teal shirt would be nice as would a peach or navy color and I love yellow, although my older sister doesn’t like it at all.
My niece was unable to attend this year and we missed having her along....maybe it will work out that she can go with us next year.

Our hostess B. J. was again wonderful and we hope we didn’t make it too much work for her so we can come again. We bring in all the meals and snacks plus each bring a bottle of wine from our local. We wash and dry as much of the bedding as we can before we leave and re-make the beds. B. J. lives right in Paducah in a cute house with a wonderful screened in porch. We take advantage of the porch and have “happy hour” each evening after we return as our meal is heating. B.J. wants to see what we purchased and how we will use it and what sights we have seen. She is a lovely woman and great hostess!
Our trip home was quite the adventure to remember too. We were on the road only about an hour when we came to a halt on the interstate. Apparently a truck caught fire and kept re-igniting so all north bound traffic had to sit and wait, and I mean sit and wait 2 hours and 40 minutes. We shut off our car and got out to visit with other stopped travelers. There was a school bus full of band kids heading to a contest and we wondered if they made it in time. We had a nice visit with a gal from Australia who had also been at the show so that was fun too.
That was not the end of our travel wows that day though. At St. Louis we had about an hour delay getting through road construction then later we ran into heavy rain and saw a couple more accidents that had happened recently. Jeannine, Diane and I moved our stuff to Diane’s car at Columbia for the next leg of our trip to Kansas City and wouldn’t you know when we were on the east edge of the city there was another traffic stop on the interstate due to another accident. Diane whipped off at the exit right before the blocked cars and zig-zagged through KC to get to her home. Sure glad she knew her way around as I would have had to just sit and wait.
Needless to say we were all very tired when we got to Diane’s almost 12 hours after we started on our trip home but after a good nights rest Jeannine and I headed back to Nebraska the next morning.
We look forward to it for so long and the time at Paducah goes so quickly it seems.
Lynn

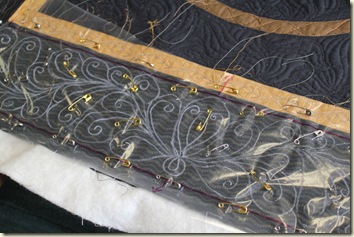
 I cut a piece of water soluble plastic like material and laid it over the quilting design I had drawn. I don’t know what the brand name of this plastic film is but have had it a long time and think I remember buying it in the machine embroidery section of the fabric store. It is heavier than Solvy, another product that looks like clear plastic and dissolves in water.
 I marked the design with the Chubby Crayon by Miracle Chalk. It feels like a crayon, marks white marks on fabric or this plastic and the website says has chalk in it too that will disappear with heat from an iron. I don’t think I need it to disappear since I am marking on the plastic but didn’t want to use a regular crayon in case some marks might transfer over to the black fabric.


 I
I


