Thursday, December 25, 2014

Merry Christmas

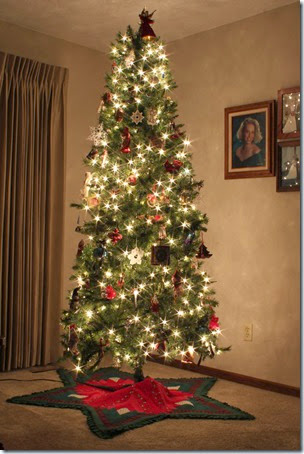
IMG_2816We set up and decorate two trees in our house each year.  This is the big one in the living room that will have gifts under it today, awaiting the arrival of our family.  It is decorated with a mixture of ornaments, a lot of which have sentimental value to us.

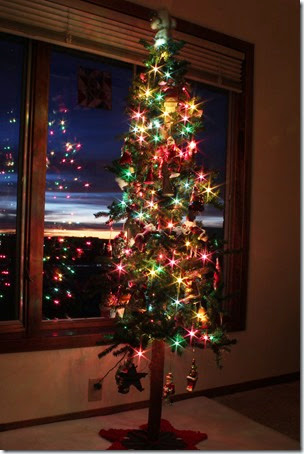
The other is a pencil tree we set up in the family room.  It only has Santa ornaments hanging on it.  I didn’t set out to have one tree with only Santa ornaments but after I realized I had so many I sorted them out a few years ago to be hung on this skinny tree.IMG_2821I took this photo of the pencil tree as the sun was coming up this Christmas morning and you can see the sunrise through the window.   John has two train sets a large O scale one he puts under the big tree and a tiny N scale one he puts under this one.  This year he is waiting for the grandkids to arrive so they can help him set them up then they all will play with the trains, taking turns….even grandpa!

Wishing you peace and joy in the coming year and a very merry Christmas!

Lynn

Thursday, December 18, 2014

Cardinal Pattern....Revisited

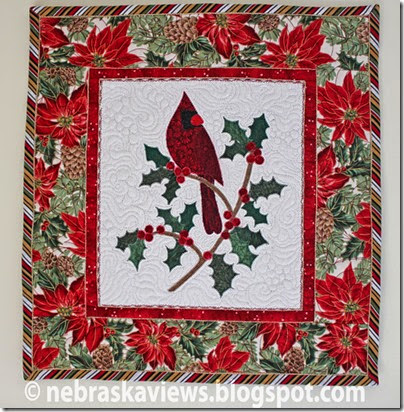
IMG_0627As I hung this small cardinal wall hanging when I was decorating my home for Christmas I remembered I had posted the pattern in 2012 and decided to share it again this Christmas for those that might have missed it before.  Click Here for the pattern to make it for your personal use.  To read the original blog post on December 19, 2012 and learn how I made it just click on that link too.

Happy Stitching,
Lynn

I have added this to Bonnie Hunter's Christmas Linky Party on Quiltville's Quilts and Snips so check out the other wonderful Christmas projects listed there.

Wednesday, December 17, 2014

New Santa

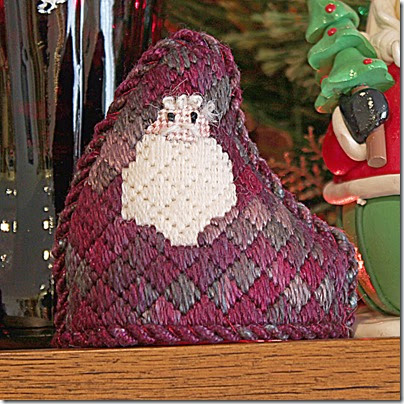
IMG_2771Isn’t this the cutest needlepoint Santa?  I purchased him at the Art Market at the Museum at the International Quilt Study Center in Lincoln, NE a few weeks ago.  The booths were filled with all varieties of art work for sale with at least part of the profit going to the IQSC.

I was temped by several items but this small Santa just stole my heart.  It works into my Santa collection as I don’t have one like it and there was room to fit it on the fireplace mantle with a the majority of my other Santa figurines/dolls. IMG_2770If I counted right there are 28 different Santas displayed on the mantel this year.   Walking around the house and looking for other Santas I found 11 more sitting in other places plus my pencil Christmas tree that is decorated only with Santa ornaments.  If I get a chance to photograph them I will share close ups of more of them on a later post.  When I look at each of them when I unpack them I think to myself…”this one is my favorite.”  Then I unpack the next and say the same thing.   I guess it is a wonderful thing to love them all!

Until Later,
Lynn

Wednesday, December 10, 2014

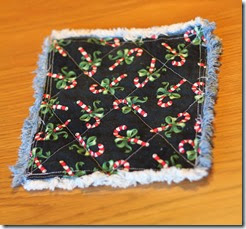
Hot Pad or Christmas Mug Rug

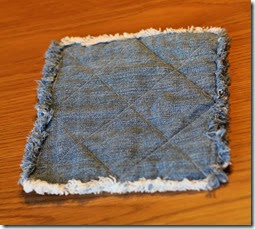
Another friend just gave me a hot pad as a gift.  It is made like the ones I make out of old denim blue jeans.  I blogged about them on this post from back on July 21 2011.  Check it out for a tutorial.  You can find more of these potholders on blog posts here and here  too.
IMG_2718-flakeIMG_2718-flakeIMG_2718-flakeIMG_2718-flakeIMG_2718-flake
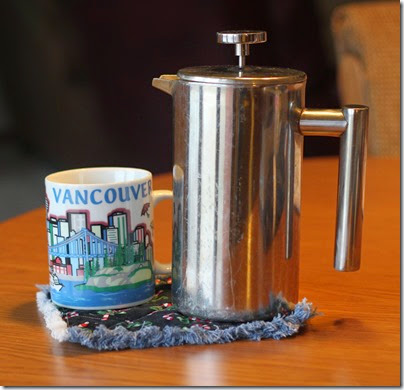
As you can see I have decided to use this newest one as a mug rug for my pot of tea and my mug.  I use it every morning as I sip my tea and read my morning email and the newest posts from my favorite bloggers. (Yes, I make my tea using loose leaf tea in a coffee press and it works great!)IMG_2716
This particular hot pad is a little smaller than I make mine but works great all the same.  Wanted to use this one a lot right now as it is a Christmas themed one with candy canes on the fabric.
IMG_2718IMG_2719
These really do make the best pot holders and so quick easy to make too.  In fact they are the only ones I use now.  No heat comes through and no burns to my hands with these.IMG_2718-flake
Until Later,
Lynn

Sunday, December 7, 2014

Cathedral Window Ornament

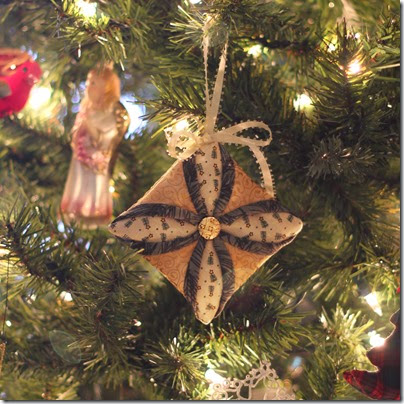
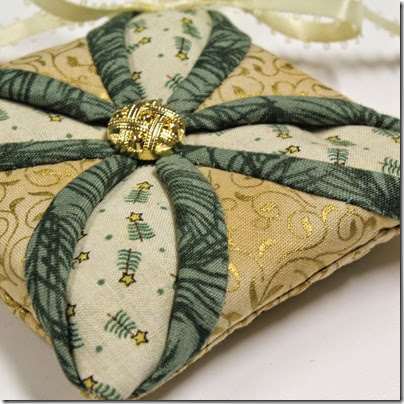
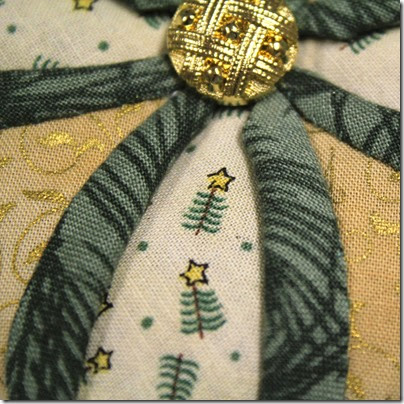
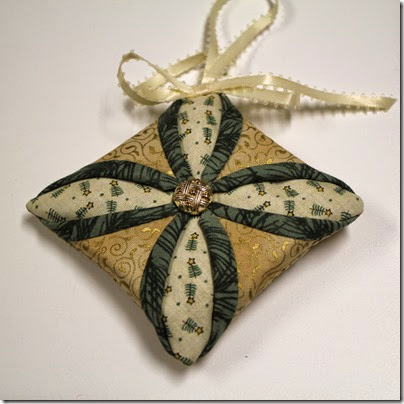
IMG_2713One of my good friends just gave me this cute Cathedral Window Ornament that is now hanging on my Christmas tree.   It has a little stuffing, tufted with a button and hung with a ribbon.IMG_2702.jpg-bI love the little tree print she used for the inside of the window.  Tiny, tiny Christmas trees!  It is important to have good contrast between all of the fabric choices so all the detail work can be seen.IMG_2705
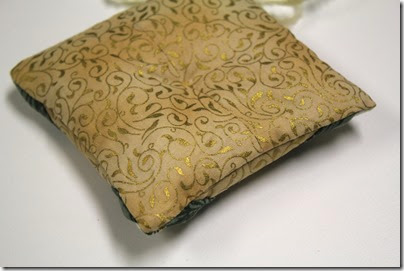
IMG_2707As you can see from the photo below she used just one piece of fabric rather than making a Cathedral Window block for the back– just as pretty!IMG_2706I am not sure where she got her pattern but found one that sounds like what she used.  It is called a pin cushion but you could put a little less stuffing in to make this ornament.  The size of the original square is what she said hers was too so I know it is probably pretty close to how she made mine.
Cathedral Window Pin Cushion Tutorial from My Go-Go Life

Until Later,
Lynn

Friday, December 5, 2014

Good News–Bad News

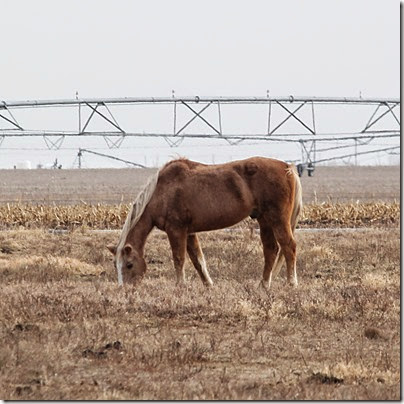
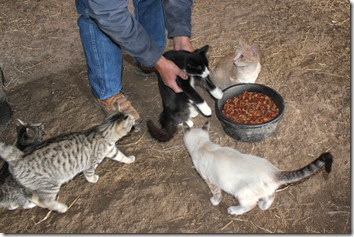
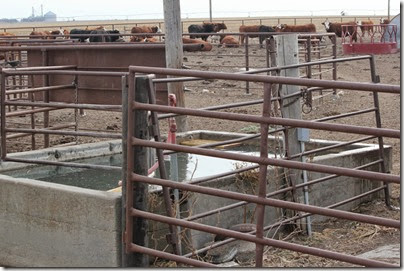
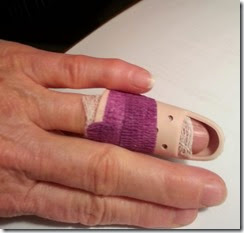
My Day started out good…..My husband is not home for a few days  so it is my job to do the outside chores.   Tuesday morning I went out to feed our barn cats and let our geriatric horse out of his stall to join the rest of the horses.  Lucky is 30 years old and gets put in a stall by himself each night and given his own old man horse food. It takes him a long time to eat as has trouble keeping his food in his mouth as it falls out of his cheeks as he chews.  We feed him in a large bunk so the feed that falls out goes back into the bunk and he gets it all gone eventually.  Here he is in the pasture after I turned him out.  As you can see, he really looks like an old horse as his back is saggy and his ribs are more prominent too. He was my father in laws horse and will live out his last years here on the farm.  The life span of horses is 25-30 years so you know he is very old for a horse.IMG_2696More good news….I next fed the cats – we have lots and some are tame and some are wild.  I even got to pet some of the semi-wild ones.  We feed them in the barn in the mornings so the food will be all eaten up by night as that is when raccoons and opossums come into the barn at times and they love cat food.  We don’t need to be feeding them as they will eat a lot and once they know the food is there they come in all the time and it makes it dangerous for the cats as raccoons will kill cats and especially kittens so we don’t want to attract them.  The photo below was taken in 2012 of John feeding them.  He always tries to pet the ones he can catch and feeding time is a good time to do that since they are a bit distracted by the food and has tamed down quite a few that way.IMG_0309Starting to get to the bad news….I next went out to check the water tank for the cows and horses and it had frozen and had about an inch of ice on top.  The cows were licking it trying to get to the water underneath.  Looking around I found a wooden fence post so decided to use it to pound holes in the ice for the animals to drink instead of wait for the fellow that is helping with the cattle chores to come and break the ice.  First hole done; this post is working great!  Well, if I got one hole punched through I might as well do more.  After about the 3rd hole I reached across the tank to make one on the other side, raised the fence post high over my head and slammed it down as hard as I could.  Whoops…here is where the bad news comes in…. As the post hit the ice on the far end, the near side where I was grasping it with both hands hit the edge of the cement tank.  Wow, that hurt!  Checked my ring finger on my left hand and the tip was tilted down.  Thinking it was my fingernail I just pushed it down, no problem as the finger was numb.  I wrapped it in some tape and iced it down and continued with my day figuring I would probably loose my fingernail in time.  Here is the old cement tank where I smashed my finger.IMG_2699More bad news….It was hurting some in the afternoon but not too bad. After thinking about it and talking to someone about it they suggested I better go to the Dr. and get it x-rayed.  So that is what I did yesterday and guess what?  I broke the bone in the last section starting below my fingernail and across to the other side.  I now have this lovely finger protector to wear until it is healed.  I asked the Dr. how long that would be and he said 3-6 weeks until tapping the end on a table doesn’t hurt but did suggest not to do any tapping with it for about 3 weeks.  As you can see from the photo below the finger protector thing I have to wear sticks out a ways.  It is hard to type and I have caught it a couple of times but have not hurt my finger so it is doing it’s job.2014-12-03 20.07.53Some good news…The Dr. did tell me that when I pushed the fingernail down I probably put the bone back in place.  He asked if that hurt and I said no, it was numb.  He chuckled and said it would have really hurt if he would have had to do it yesterday.  Everything is in line now to heal and hope I heal quickly. 


Some more bad news….I am left handed so some things are just a little difficult to do with this thing on my finger.  Typing is hard but not impossible as the other fingers can take over but I do make more mistakes.  Holding anything is very awkward too and I have trouble holding a knife and cutting anything.  It is a good thing that I am somewhat ambidextrous and can use my right hand a bit. 


Good news….no more making holes in ice in the tank as it warmed up a little and our neighbor who is helping me check the cows will do it if it needs to be done from now on.


No one will ever accuse me of being graceful and coordinated, klutzy and clumsy is my name!


Until Later,
Lynn
Wednesday, December 3, 2014

QuiltNebraska 2014

IMG_1824
Shirley, Janet, Fay, Me (Lynn)
Another QuiltNebraska in the books the end of July and as usual it was fun to take classes, meet and visit old friends and participate in a Nebraska State Quilt Guild activity.  This year’s convention was held in North Platte, Nebraska which is about a 3 1/2 to 4 hour drive from here.  I love that our annual convention moves around the state so we can have a different experience each year.  There are always new people to get to know as well as those of us perpetual attendees. QuiltNebraska, of course, always means rooming with three of my long time quilt friends.  We look forward to catching up with each others lives as well as spending time together doing what we love.  We had to chuckle this year as we used to stay up late into the night time hours and visit but now “lights out” comes a lot earlier.

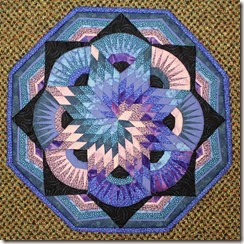
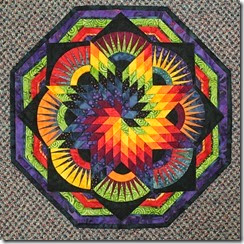
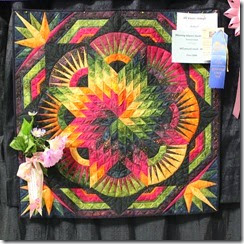
This year I took two all day classes instead of half day classes.  Half day classes are fine but sometimes I feel so rushed if they are sewing classes.  Seems like you just get the machine going and the project started and it is time to clean up and be done with the class.   This first class, “Spectrum”, was taught by Jill Vanderboegh.  The project she taught is pictured below in two color ways.  She had a great way of speed piecing the foundation pieced diamonds.  She did give us a choice of making this small 12” version or a larger version which I forgot to take a photo of at convention but did get a photo of it at the Nebraska State Fair where it won a blue ribbon.  As you can see it was slightly different in that it was squared out with piecing in the corners and was approximately 24”to 28” across.
 IMG_1814IMG_1815
IMG_2085I chose to do the small 12” one and will show you my progress in another blog post as I am still working on it.

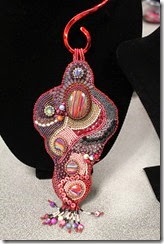
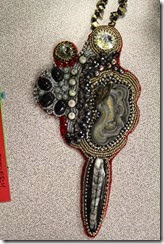
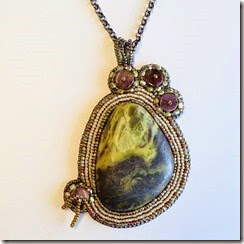
The second class I took was taught by Kay Grimminger on making a free form beaded pendant.  I had such a good time in this class and Kay’s pieces are exquisite!  We all started with a cabochon and from there on it was our decision of what beads we wanted to stitch on and where we wanted to place them.  Here are 2 of Kay's pieces below.
IMG_1819IMG_1822 
This is the piece below that I had nearly finished by the end of the day long class.  Love the colors and it really was fun to make.  I didn’t get too elaborate with the shape or the number of kinds of beads as  I don’t really like to wear really large jewelry and wanted to get it finished.IMG_1854
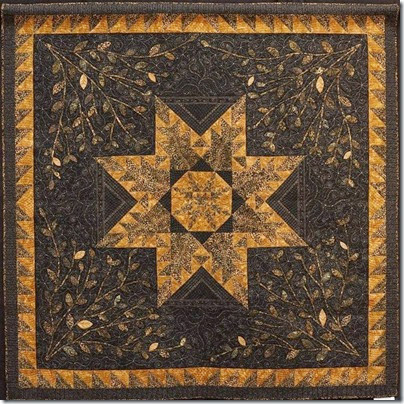
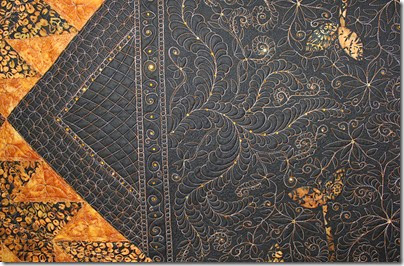
Each year the NSQG members await the unveiling of the new raffle quilt with much anticipation.  This year the quilt did not disappoint.  It is a gorgeous black and gold double feathered star with appliqued vines and leaves in the corners.  The quilt is further enhanced with beautiful machine quilting done by Nebraska’s own award winning quilter Kris Vierra.  Crystals were applied to the quilt to add sparkle.  To read more about this quilt check out this webpage on the Nebraska Quilt Guild’s website.Shimmering-Stars-full
IMG_2083 Of course I have my tickets purchased and intend to win this quilt next July!  I say that every year but this is one I really would like to own.

Lynn

Monday, December 1, 2014

Denim Blue Jeans Stockings

In 2010 I made Christmas stockings for my whole family from old denim blue jeans.  It was a fun and fairly easy project to do.  I blogged about the steps to making them on several posts but never posted a pattern until now.  It has been a very popular blog post series and has been passed around Pintrest a lot the last few years.  It seemed when ever I would think of getting a line drawing of the stocking pattern the stockings were all packed away with the Christmas decorations but you are all in luck now.  Again a reader asked for the pattern and I just happened to have them all out ready to hang on the fireplace so traced around one of them and made a PDF pattern that you can download and print.
Download the PDF pattern from this Link.  Remember this is my pattern and I am allowing you to use it to make your own stockings but do not steal this pattern and publish it as your own work.  Please adhere to my request.  Share the link with friends, that is OK, but do not copy any of my blog pages or this pattern to publish on another webpage or for sale!

This is a fairly large stocking as I wanted it big enough I could actually fill it with small gifts.  If you want a smaller stocking just reduce the printed pattern on a copier.

Below are the links to the original posts where you will find instructions, pictures of finished stockings and hints and tips I learned along the way.


Part 1 Christmas Stocking Fun
Part 2 Christmas Stocking Fun Part 2
Part 3 Christmas Stocking Tips
Part 4 Denim Jeans Christmas Stockings
Part 5 More Stocking Hints And Observations
Part 6 Two More Christmas Stockings
Part 7 Hanging The Stockings
Part 8 More Stockings To Show
Part 9 Another Jeans Stocking For The Fireplace
Part 10 Pattern (this blog post)
Let me know if you have made any of these stockings and send me a photo as I would love to see what others do with the pattern.

Lynn

Sunday, November 30, 2014

Blogging Break….

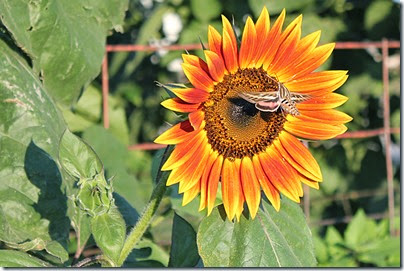
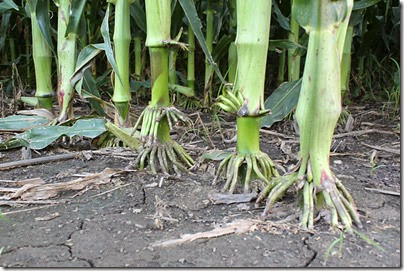
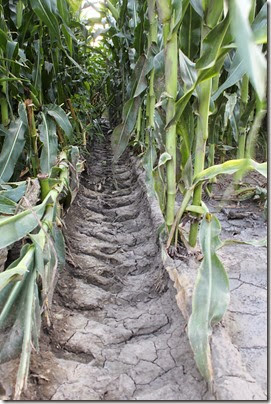
I really did not intend my infrequent blogging to turn into months without a peep from me on my blog.  One day without blogging turned into two…then a week….then several weeks to end up months.  My health is good so no worries there but got so busy with yard and garden work, grandkids activities, family visits and I confess I just got lazy and more lazy the longer it was since I posted.  I am sorry for those of you that checked in on me here and were disappointed to find nothing new.  I just hope some of you return to check again!IMG_1975I know we are almost through fall here in Nebraska but wanted to share a few more photos I took this last summer on walks around our farm.  I love taking my camera along and seeing what I can capture.  The photo of the sunflower is one of the large ones I planted along my vegetable garden.  They were beautiful until one thunderstorm with strong winds blew that broke most of them off at the point where I had tied them up.  The moth hovering over the sunflower is a Sphinx moth that can sometimes fool people into thinking it is a Hummingbird.IMG_1996Those of you not familiar with corn plants might not realize what they look like at the ground level.  The plants grow these finger like appendages we call “air roots.” They grow down from the last few sections of the corn plant and help anchor the plant to keep it more stable as the ears grow and get heaver and in windstorms.  These air roots really do help it stand upright and are just cool looking!IMG_2000The above photo is of the track made by a wheel of the pivot irrigation system through the cornfield.    If you want to know more about center pivot irrigation check out this webpage.

Welcome back!
Lynn

Wednesday, November 26, 2014

Happy Thanksgiving

American Thanksgiving greetings to all my friends far and near.  I want to share the following by Joanna Fuchs as it expresses how I feel.  Check out her web page for more of her poems on all subjects.

Thanksgiving Delights
On Thanksgiving Day we're thankful for
Our blessings all year through,
For family we dearly love,
For good friends, old and new.
For sun to light and warm our days,
For stars that glow at night,
For trees of green and skies of blue,
And puffy clouds of white.
We're grateful for our eyes that see
The beauty all around,
For arms to hug, and legs to walk,
And ears to hear each sound.
The list of all we're grateful for
Would fill a great big book;
Our thankful hearts find new delights
Everywhere we look!
 
By Joanna Fuchs
 
 Blessings,
Lynn

Saturday, July 19, 2014

Coneflower Beauty

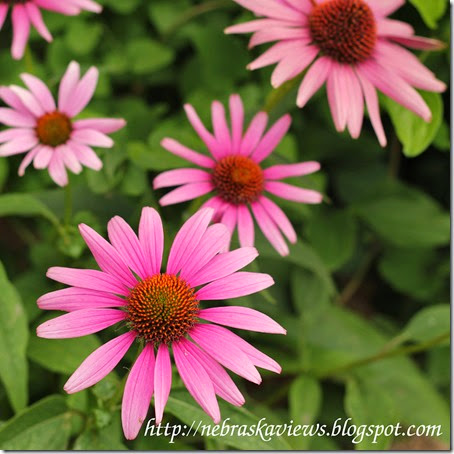
IMG_1432-brighter-signedAnother photo from my garden, coneflowers this time.  I would like to get other colors of coneflowers but all I have right now are the pink ones.

I have no stitching projects to show as there is very little stitching going on right now.  It seems like all my time is either spent taking care of my many flower beds, vegetable garden or traveling to grandchildren’s events.  Just yesterday we went west 2 hours to our granddaughters county fair and watched them show their 4-H sheep.  It is always fun and we enjoy watching them in the show.  They don’t get the top ribbons but do ok and they should be proud as they do all the work for their animals unlike some who just show the animal in the ring and the parents do all the feeding and grooming.  Our granddaughters know it all as they do it all with guidance of course from their parents.  Next week we will travel only an hour this time to go see our two grandsons show their sheep.  Will be fun to see the youngest as this will be his first time as a 4-Her to show his sheep.  He is getting excited for the fair to be here.

Happy Summer,
Lynn

Sunday, July 13, 2014

Day Lily

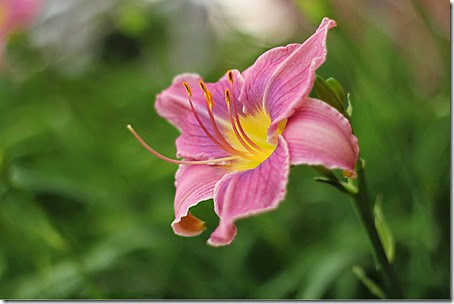
IMG_1160Enjoy looking at one of the beautiful Day Lilies in my flower beds.  Gardening takes time and the results are most times either good to eat or beautiful to look at.
Lynn

Wednesday, July 9, 2014

Storm Clouds

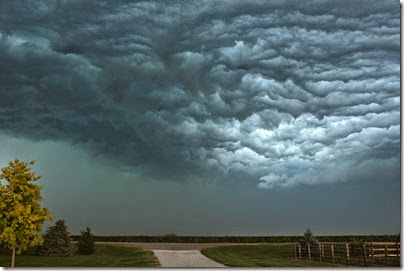
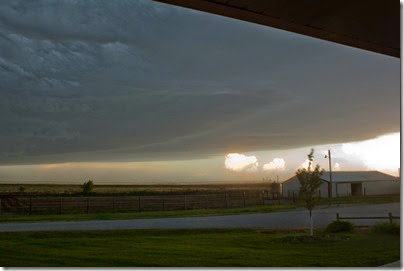
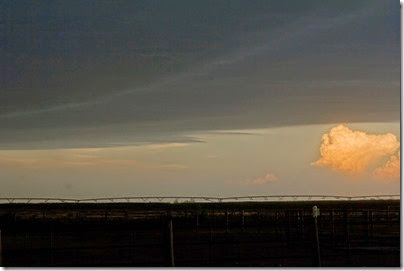
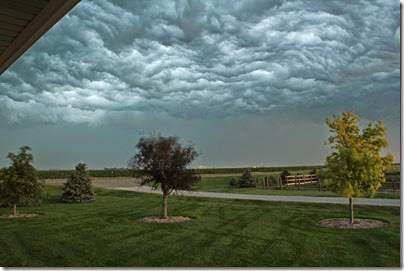
IMG_1375This last week we had a storm roll through towards sunset time.  It had the most unusual cloud formations and you could hear the wind roaring above as the clouds passed over.20140706-IMG_1384It was light out until the clouds started blocking the sky.  You can see large thunderheads in the distance over our barn roof.  It was starting to rain so I ducked under our porch roof to take this photo.20140706-IMG_1378  The distant clouds are so pretty when illuminated by the almost setting sun.  You can see the top of the pivot irrigation system over the top of the corn in the photo above.IMG_1387A parting photo before I went back into my house as it was just starting to pour rain.  We only got .40” but thankful for no strong winds on the ground and no hail which would be devastating to our crops at this point in the growing season.

Until Later,
Lynn

Saturday, July 5, 2014

A Farmer And His Toys

A photo I just took yesterday on the 4th of July of my husband John and his newly restored 1957 Oliver Super 88 tractor and circa 1960s International plow all decorated up for the holiday and parked close to the highway for all travelers to admire.

Until Later,
Lynn

Tuesday, July 1, 2014

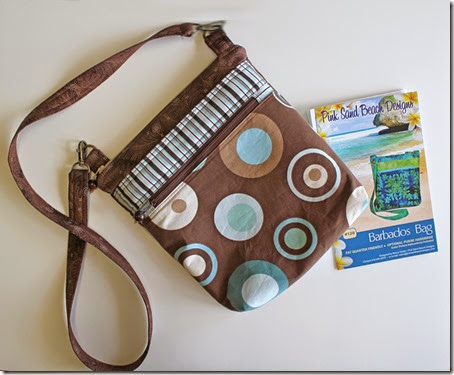
Another New Fabric Bag–Barbados Bag

2014-05-30-17.29.20
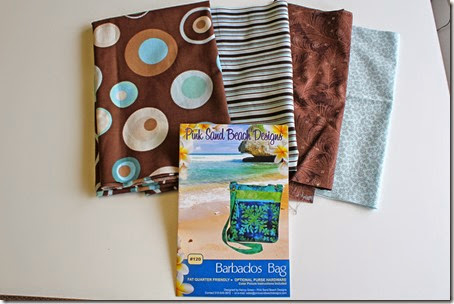
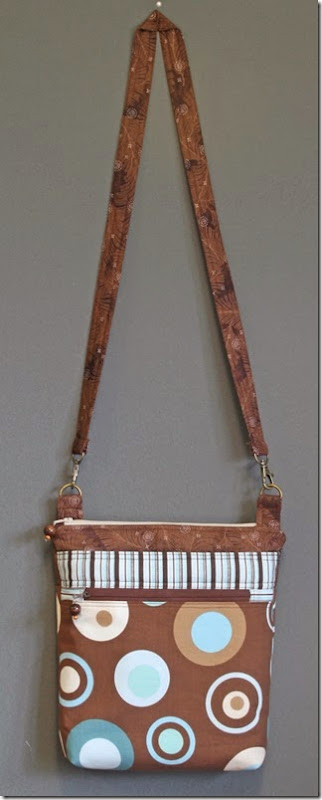
Found time recently to make another bag using a Pink Sand Beach Designs pattern called Barbados Bag.  I chose the coordinating brown and teal fabrics I already had in my stash for the bag.  I love the large poke-a-dot fabric!  The poke-a-dot, stripe and brown were for the outside an the light teal for the lining.  Important thing I have learned from experience is to keep the lining to purses/bags light colored as it is so hard to see what is in the bag with dark lining.   Did that once and never again as I can never find what I want in the black fabric lined bag.  Below are photos of the outside of the finished bag.
IMG_0843  IMG_0846
I pretty much followed the directions from the pattern for the making of this bag, just making a few deviations as far as interfacing and changing and adding pockets to the lining.  I changed to a lighter weight interfacing as the one recommended was way too stiff for my fabric.

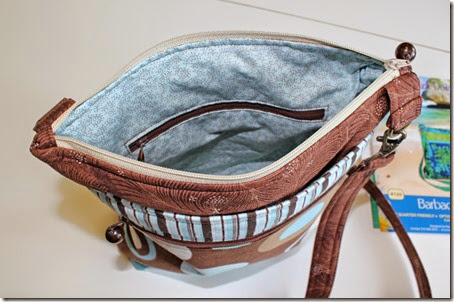
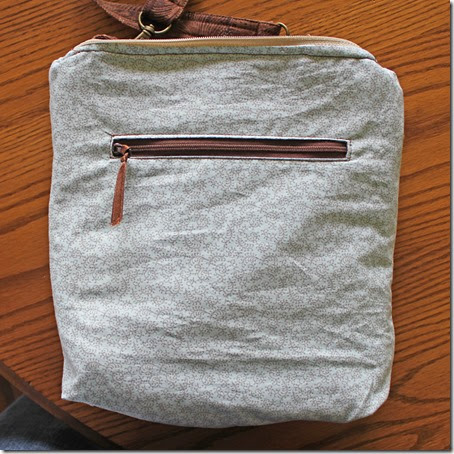
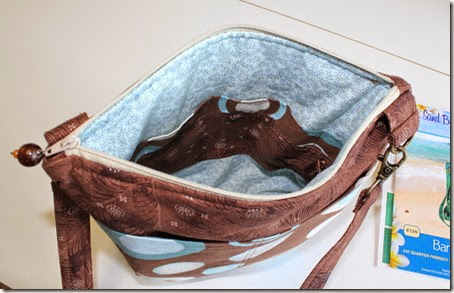
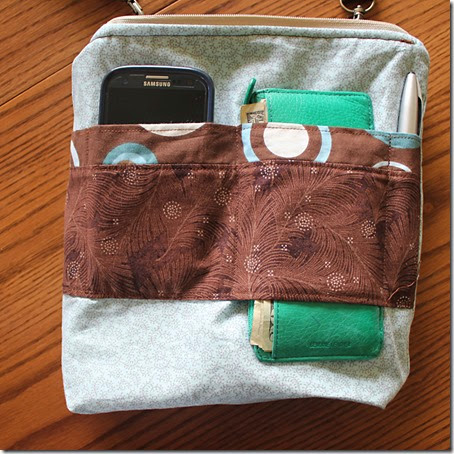
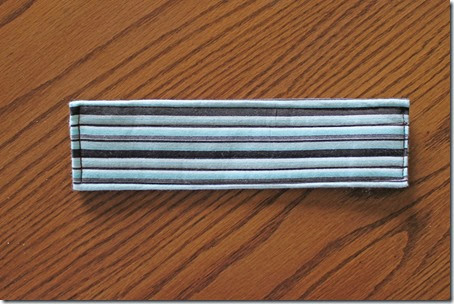
At first I thought the bag might be a bit too deep but after carrying it for a while I have found it to work great the way it is.  I did find that the deep pocket on the outside (behind the stripe) is just the right depth to carry my Kindle or Samsung Note 8.  IMG_0835IMG_1310I added the zippered pocket on the inside of the bag.  There is always something I want to keep more secure on the inside of a bag so if a pattern doesn’t have a zippered pocket on the inside I add one.  I turned the bag inside out to get a better photo than the first one.  It is just hard to get a good photo of the inside of a bag no matter how hard I try to get the camera at the right angle.IMG_0836IMG_1309The other side of the lining called for a long patch type pocket and I made a few changes to it too.  This idea came from my sister Jeannine and it is brilliant.  Instead of stitching the entire bottom of this long patchwork pocket down you leave the bottom of one section open.  This works great to slip my wallet into or can be used to hold a check book too.  The bottom of the wallet rests on the bottom of the bag and the top is easy to reach and very accessible when I need it.  This is an idea I will definitely use again.  IMG_1311The last thing I did differently than the pattern was to make a bag bottom stiffener.  I started with a piece of plastic needlepoint canvas cut to the size of the bag bottom.  Covered it with fabric and stitched through it to secure.  Just put in the bag and press to fit the bottom – it stays put and the plastic is easy to stitch and this makes a flatter bottom for the bag.IMG_0833
Until Later,
Lynn

LinkWithin

Related Posts Plugin for WordPress, Blogger...