Only read this on the original blog post as it has
been pirated. You will find a link on the right sidebar of my blog
http://nebraskaviews.blogspot.com
Only read this on the original blog post as it has
been pirated. You will find a link on the right sidebar of my blog
http://nebraskaviews.blogspot.com
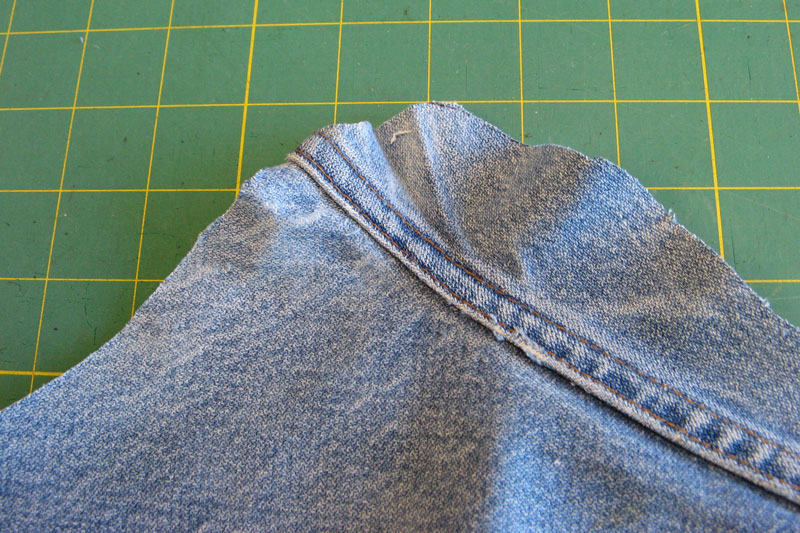
Thought I would share photos and clarify a few things I told you about in previous blog entries. A few of the stocking fronts were kind of wavy on the heel as I had cut them from the back seam of the jeans and either the fabric isn't flat when I cut it or because of all the bias I ended up with a stocking that wouldn't lay flat.
OK, look at the first photo and you can see the extra fabric. Since this area will be covered with the fused heel piece I just pressed the excess fabric into a fold. The fused heel will cover it and you don't even know it is there and your stocking lays flat.

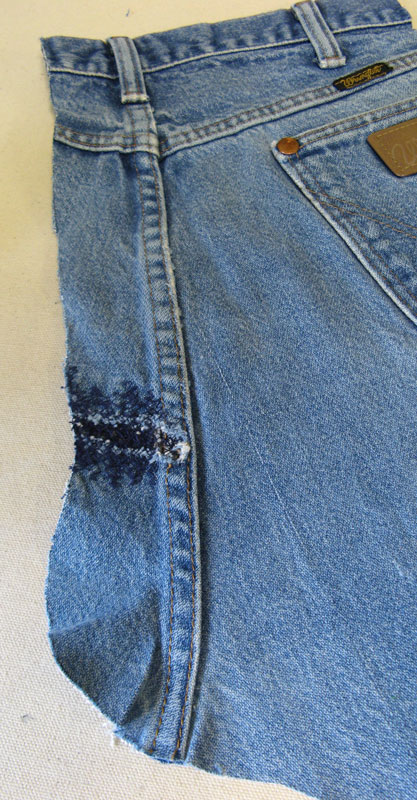
The hanger for the stocking is cut from the flat feld seam. Some may not know what or where to find that kind of seam on a pair of jeans. The yellow arrow points to a flat feld seam and this seam is usually on the outside of the legs. This is a bottom leg of the jeans that I had cut a stocking back from. Cut closely on both sides of the seam and use this strip for the loop hanger for the stocking. The seam is very thick and sturdy.
I stitched the loop onto the back before I joined the back to the front. I placed it about 1/2" away from the edge to allow the seam to be stitched without having to stitch through the loop when putting them together. I did stitch over the ends 4 to 6 times to make sure it would not come loose.
The loop is stitched on side that is above the heel of the stocking. Let me think, what else....Oh I cut the strips for my stockings 10" long but cut them what ever length you want for your stocking.
I did share that you want to avoid the rivets, and heavy seams or belt loops on the edges where you will be stitching. On one stocking I had cut it with the loop right on the edge so I just stitched to the inside of the loop then back out to the normal seam allowance.

I used the zipper area in two stockings. One stocking only had part of the zipper so I just cut the zipper teeth off and it stitched up just fine. The one where I used the entire zipper in it was a little trickier to stitch the seam. I had to use my zipper foot to stitch close even though I had left a 1/4" seam allowance it wasn't quite enough seam allowance on the outside of the zipper. The seams at the bottom of a zipper are tough to pierce with a needle too and I did break a needle on the tough seam in that area.
One thing that happens to jeans that have been washed and dried many, many times is that the fabric in the seam allowances gets very stiff and tough. I ran into those types of seams on several of the stockings but stitched slowly and used the titanium Superior topstitch needle size 90 but a size 100 would have been better.
Maybe you noticed the patched area on one stocking. I decided that it added a little more interest and didn't even try to cover it up or avoid it.

The names were drawn onto the stocking - learned that worked better than just free handing the name like I did with the first stocking. John's stocking was my prototype and I had trouble keeping the name straight and the letters even sized.
I chalked lines on the stockings after that and drew the letters on these registration lines. It was so much easier to get it all even and was easier to stitch since I could see where I was going next. I dropped the feed dogs on my machine and used the open toed embroidery foot and set the zig-zag stitch to a width of 2.8. I went slow and sometimes would go back over the stitching to make it dense enough to show up.
My Bernina has a buttonhole stitch that goes back and forth to make a heavier looking stitch. I really think the thread shows up more with this stitch than the single buttonhole stitch. It is stitch 1330 on my 730 Bernina. The width was set to 5 and the lentgh set to 4.
I touched on thread color before but can not stress how important it is that the thread shows up on the denim. The jeans I used were a middle value of blue and some thread did not show up well at all. The green thread is one that I used and basically the stitches really disappear because they are the same value as the blue jeans. I did find that if I could find a stitch that was more dense it helped those threads but still not the best choice. You notice I didn't dislike it enough to rip it out though!
One last tip...if you click on one of the photos and it still isn't big enough to see what you want you can try this trick. This works on PCs but don't know about MACs. Click on the photo and open it in a new window then hold down the "ctrl" and roll the scroll wheel on your mouse. If you roll the wheel one way it will make it larger and the other way it will make it smaller. You can make the printing on most web pages larger or smaller this way too. To get it back to where it was before just scroll the opposite way.
Did I leave anything out or anything that is unclear on the making of these stockings? Let me know if you have any questions and I will try to answer them.
Lynn
Update: Here are the links to all the stocking blog posts.
Part 1
Christmas Stocking Fun
Part 2
Christmas Stocking Fun Part 2
Part 3
Christmas Stocking Tips
Part 4
Denim Jeans Christmas Stockings
Part 5
More Stocking Hints And Observations
Part 6
Two More Christmas Stockings
Part 7
Hanging The Stockings
Part 8
More Stockings To Show
Part 9
Another Jeans Stocking For The Fireplace
Part 10
Pattern

 When I found out my brother would be here at the same time as our daughters and their families this Christmas I knew I needed to make a stocking for him from another old pair of jeans. If you want to make one of your own please refer to the Tips and Tutorials page of my blog for the 5 part series of photos and directions for making these stockings from an old pair of denim blue jeans. Starting on November 21, 2010, I made 12 of these stockings.
 Here are the pieces needed to make the stocking….a front cut from the waistband for the top of the this piece, a back piece that is cut from the hem of the jeans for the top edge and cut about 1/2” wider than the front piece, two pieces of cotton print for the toe pieces and a long piece with the excess fabric trimmed away from the flat felled seam of the jeans. As you can see I left the pocket intact and hanging out right now. It will be trimmed off after the pieces are stitched together.
 Using coordinating or contrasting thread stitch some lines of decorative stitches with your machine to outline the fused toe and heel pieces and anywhere else you want to add a little embellishment.
 Pin the front to the back, straightening the pocket that hangs out to lie flat. Match the top edges and pin the layers together and as you can see the back sticks out beyond the front. The edges will be stitched 1/4” inside the front pieces then trim the back even with the front. RAW EDGES stay on the outside so this is an easy stocking to make. No lining either.
 All finished and ready to use. We celebrated with our daughters and their families and my brother over the weekend. Chris was so surprised at the stocking and the goodies it contained. Christmas day we will travel to see my mother and more siblings so more gatherings to come.