The first leg of my journey to the AQS quilt show in Paducah, KY starts early tomorrow morning..thank goodness it is finally time to leave. I am meeting one of my sisters in Nebraska City at 10:00 am. so will need to leave here by 7:30 am. Like last year we will travel to Kansas City to meet our friend then on to the Columbia, MO area where we will spend the night with our other sister. Wed. we will leave for Paducah and arrive that afternoon.
My plan to get all caught up on yard work this week didn't happen. I did get lots of weeding and mulching done but the final mowing of the yard (area outside the lawn) didn't get mowed.
Why you ask? The reason is I had to completely clean my house from top to bottom and I do mean top to bottom. OK, here is the short version of the story. We were having a larger window put in one room in the basement by our young neighbor that works for a carpenter, also helping was his not much older brother. I am not mad at them for what happened but exasperated that it happened is all.
The plan was to cut the cement wall of the basement for the window opening using a saw that is connected to a water source to keep the dust down from the cutting. Everything was working well until the saw hit metal rebar reinforcing in the poured concrete basement wall. After studying what to do they switched to a different saw and didn't realize it was creating a cloud of cement dust that was going throughout the house.
I was inside the house but taking a little nap because I had worked hours hoeing weeds in one flower bed and then using the power weed eater so I was exhausted. When the neighbor young man alerted me I got windows open as fast as I could to maybe get some of it to go outside and it did clear it out pretty fast....but....there was a coating of dust on all the walls, floors, furniture and anything else sitting around as all the room doors were open to the sewing room, bedrooms and bathrooms and the stairway door was wide open so the dust just rolled up to cover the upstairs rooms as well as all the rooms in the basement.
I started cleaning at 4pm on Saturday and worked until 10:45 that night, cleaned all Sunday afternoon and cleaned more today. I had to dust down the walls, vacuum all the floors and furniture, mop the hard surface floors, run curtains and quilts through the clothes dryer to get the dust out of them...and on and on.
I did take time today to finish doing my laundry and getting stuff packed and decided the rooms not finished will just have to wait until I get home. I do know I NEVER want to have to do all that right before a trip again as it has kind of made it hectic for me....actually I NEVER want it to happen ever again.
One good thing is I am leaving with the majority of my house extremely clean but a couple of rooms still need cleaned yet.
I had hoped to write up a few posts to be published while I was gone but that didn't happen either. If I can figure it out I might be able to post something from Paducah from my phone. If not you will have to wait until I get back I guess.
Sorry there are not any photos for this post either.
Lynn
Monday, April 23, 2012
Saturday, April 21, 2012
Quilting the Basket of Flowers
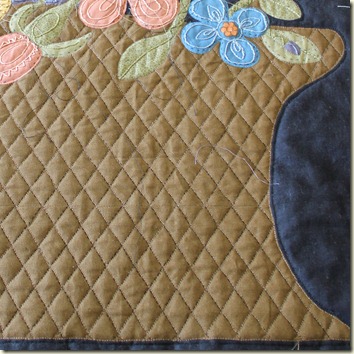
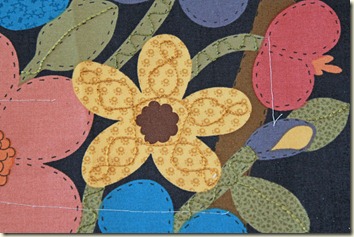
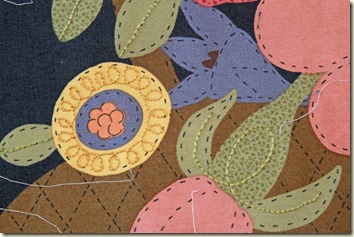
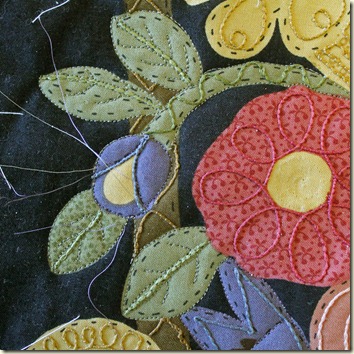 Even though this is a pre-printed panel I wanted the applique looking motifs to stand out so outline stitched each one plus quilted some of the details matching the thread to the motif. I chose to use Bottom Line by Superior Threads in a neutral color to blend into the backing fabric print.
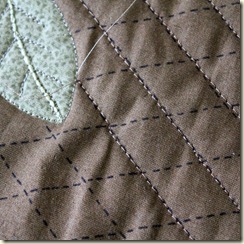 The basket has dotted lines to indicate the weave so decided to just quilt on the lines. I used my walking foot and quilted line after line….then I really looked at what I had done. Do you see the problem? The fabric was wrinkling in diagonal lines. I tried quilting the lines from opposite directions and quilting them the same direction and nothing helped. I had to sit and think what to do since I didn’t want the basket all goofy looking.
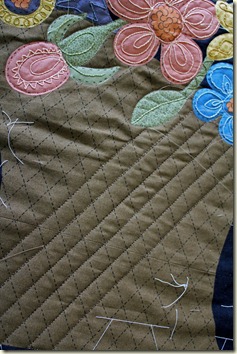 I decided to try another quilting plan and ripped out all the lines I had already stitched and proceeded to quilt it in a zig zag motion following the lines. I took the walking foot off the machine and put on the BSR (Bernina Stitch Regulator foot) so I would not have to stop and turn every inch. I admit it wasn’t easy to stay on the lines doing it free hand, and there are places where it got a little wiggly but I didn’t get any of those nasty puckers.
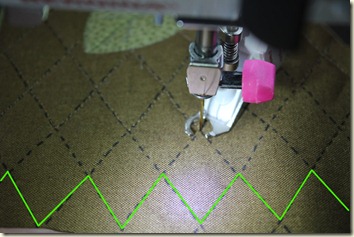
Background quilting is next so stay tuned.
Lynn
Ducklings…So Cute
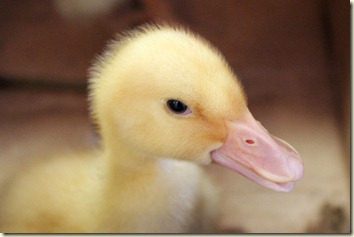 Our grandsons got three ducklings this spring and we got a chance to see them when we were at their home on Easter. What cuties! Of course I mean the grandsons and the ducks of course.
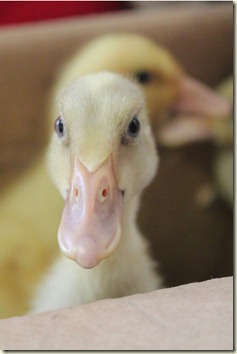 Two of the ducks are one variety and one is another but don’t ask me what they are as I don’t know. The long neck ones might be called "runners" or something like that. The two that are alike are taller and have longer necks and not quite as yellow as the other one.
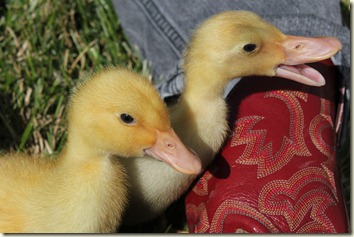
My grandson’s cowboy boot makes a good contrast to the yellow ducks and green grass. He has big feet for a 9 yr. old. His shoes are larger than mine already.
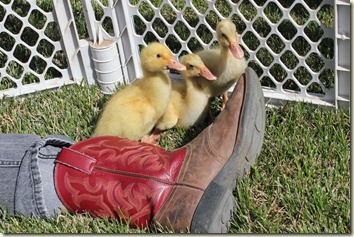 One, two, three...all together. They were so much fun to watch as they splashed in a pan of water and dug around in the grass for bugs. I am sure they are already much bigger by now as they grow very quickly.
Lynn
Friday, April 20, 2012
Panel Challenge Borders
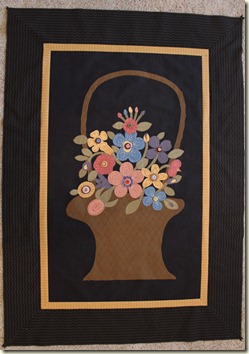 I added simple mitered borders to the basket panel. The gold/yellow print border is 1” finished and the black print was cut 5". I usually don’t bother with mitering corners but with the black print being a stripe I thought it would add a little more interest to the corners.
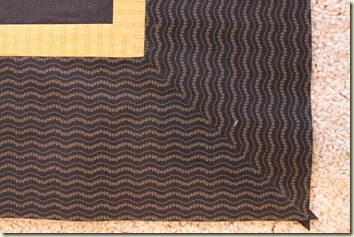
This was the only corner where the black stripe print came together perfectly. The others were not quite so flowing but look OK so I didn’t change the plan.
Lynn
Nebraska Spring
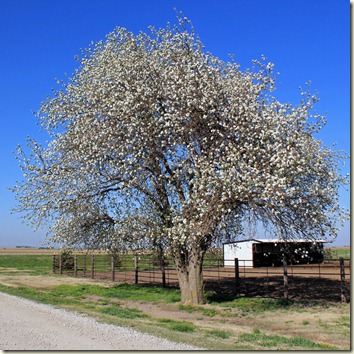
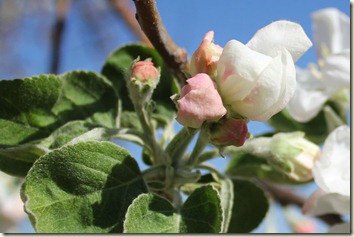
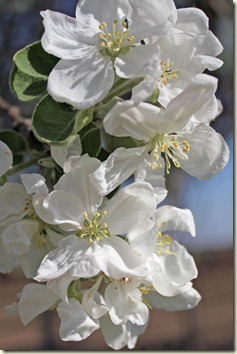
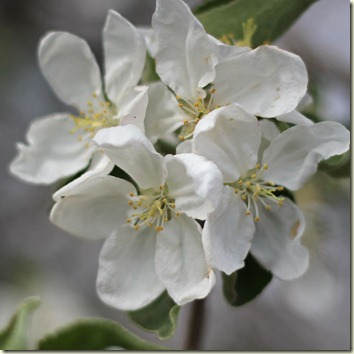
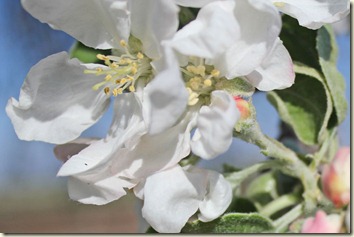
I am a little late in publishing these photos I took of our apple tree. Our early spring here in Nebraska caused everything to green up early and trees and flowers to bloom about a month earlier than usual. These photos were taken on April 1. The tree was a white ball of flowers and so pretty.
Until Later,
Lynn
Wednesday, April 18, 2012
Back to the Challenge
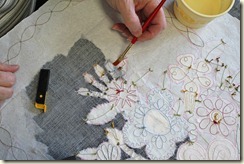
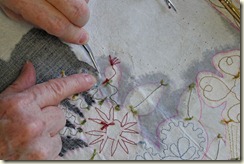
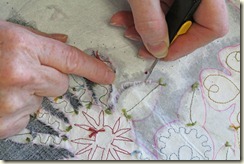
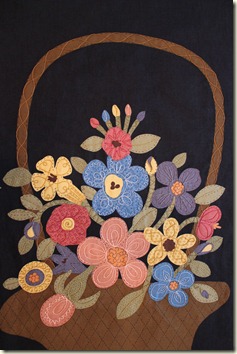 The bobbin stitching is finished and all the threads have been pulled to the back and tied so now I need to get rid of the excess stabilizer on the back. Remember I chose to use a water soluble stabilizer but I didn’t want to remove it all behind the flowers, stems, leaves and basket handle where I did the bobbin stitching. I want that little extra stabilizer left inside the quilt to help hold the stitching and to add a little more bulk to the back of the stitched areas.
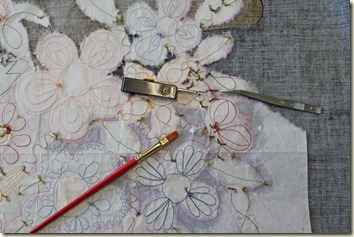 Tools I used for the job were a flat artists brush, a cup of water, seam ripper and tweezers. I painted water around the outside of each flower, leaf, etc. I pressed my finger down on the flower petal, etc. to keep it from from getting torn loose. I then used the tweezers and seam ripper to separate the background waste and remove it. Sometimes I would scratch along the line with the point of the seam ripper to get in tight places. You could use any pointy tool where I used the seam ripper to help define the outside of the shapes. This technique worked like a charm!
Here is the back with all the excess stabilizer removed. It really didn’t take all that long to remove then I let it dry so the remaining stabilizer would not crumble or get removed with handling.
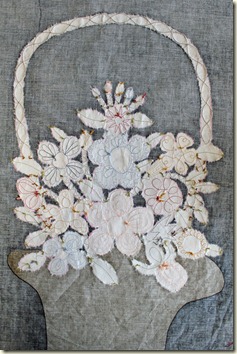 Next up is squaring up the panel and adding borders. So far this has been a fun project to work on and will use these techniques again.
Until Later,
Lynn
Wednesday, April 11, 2012
It's Almost Paducah Time
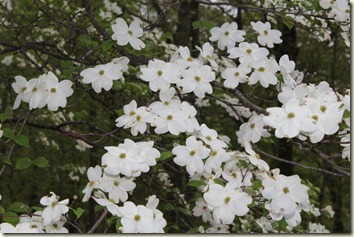
Yes, it is almost time for the annual AQS Quilt Show in Paducah. I wonder if all the beautiful dogwood trees will be finished blooming by the time we arrive since a large part of the US has had an earlier than normal spring this year. I just love the sight of these beautiful trees covered with large white or pink blossoms but am not counting on seeing them this year.
I am trying to make a list of things I want to look at or purchase when my sisters, niece, friend and I go in a couple of weeks. We stay with a wonderful woman who is the mother in law of my friend and she lives right in Paducah, how great is that! I am so thrilled and feel so blessed to get to spend time with my family and friends, attend the show, excited to see the winning quilts and to shop, shop, shop.
I am again asking for your help. Are there any notions, tools, fabrics, fusibles, interfacings, pins, needles, scissors, patterns, books (basically anything related to sewing or quilting) that you think I should consider getting or at least taking a look at. What are those things that you absolutely love? I do have a list that I started after I got home last year that I add to as the year goes along but always like recommendations too so please comment on your favorites of any sewing related item.
I do call this a shopping list not necessarily a buying list. Some things that I have seen advertised I just want to see in person and I may or may not be interested in buying them but want to find and look at them, see how they work, etc.
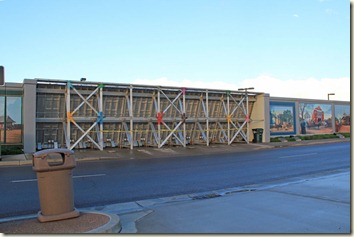
This year we should not see flooding like last year when the flood gates had to be installed and the show venues rearranged in a short amount of time. They show staff did a wonderful job but hope they don’t have that kind of emergency again. We didn’t find any problems with any of the moving around last year and know we will have just as good a time this year even if there are no changes.
Guess that is all for now,
Lynn
Monday, April 9, 2012
Book in the Mail
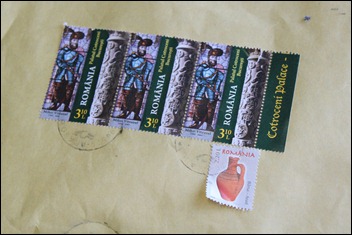
I was so excited to get the mail recently and see that I had a large envelope with Romanian stamps and post mark on it. I had ordered a quilt book from my internet friend Geta Grama, and it had just been released by C&T Publishing. Geta writes the blog Geta’s Quilting Studio and sells her patterns and book on her website Romanian Quilt Studio and is so clever and talented. It is available here in the US too since it is published by CNT Publishing so check out your local quilt shop, Amazon.com or Barns & Noble.
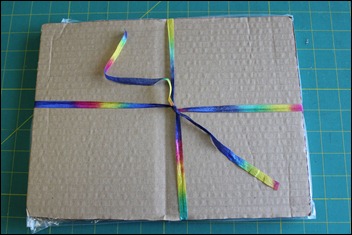 Inside the envelope were two pieces of cardboard tied with a very colorful ribbon….more excitement as I untied the knot for my first peek at the book.
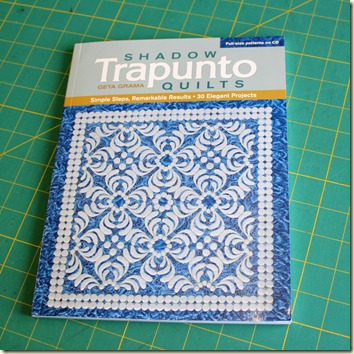 Yes… it is the book on doing the fantastic shadow quilting with a different twist that Geta has perfected using batting, organza and cotton fabric. Geta’s designs are so beautiful. She gives very good instructions in her book to achieve the same results….a very pretty book and lots of patterns to make these designs too. I just counted and if I am correct, I counted 31 patterns that need to be enlarged on a copy machine or scanner or better yet you can choose to insert the enclosed DVD that has PDF files with the full sized designs ready to print out.
 I am so excited for Geta with the the release of her first book. I am sure it will be a great success too! Take a look on her website and check out her other patterns for quilts, purses/bags and boxes while you are there. I was one of the tester’s for her Ameile bag pattern and it is still one of my favorite bags to use and you know I have made a quite a few fabric bags. She has great instructions with lots of stepped out instructions for that bag too. I wrote about it here on this post and and you can see what fabrics I chose.
Best of luck Geta on this new book!
Until Later,
Lynn
Sunday, April 8, 2012
Wednesday, April 4, 2012
Basket Panel–Bobbin Work
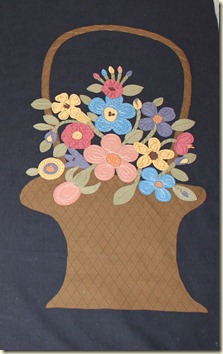
The topic of this blog post is on doing bobbin work on the flowers, leaves, stems and basket handle. First I am posting the after photo of the bobbin work so you can see what I did to the panel. Just click on the photo to get a larger version you can see the detail. (Sorry this photo is a little odd as the fabric was laying on the floor so the photo was taken at an angle.) Keep reading if you want to know how I did the bobbin work.
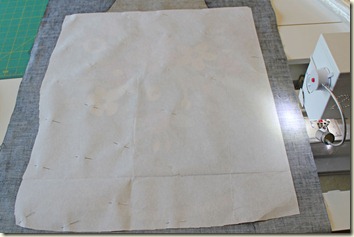
 To start, I pinned the water soluble stabilizer I had on hand to the back of the flower area then used the sewing machine to baste around the edge and in a grid across it to hold it in place. I would tell you what brand it was but don’t know as the label was gone. I do think any of the paper like water soluble stabilizers will work though.
Next I needed to get the position and shape of each flower, leaf, etc. transferred to this white interfacing. I didn’t want to mess with getting out my light box so just taped the sandwich to the window.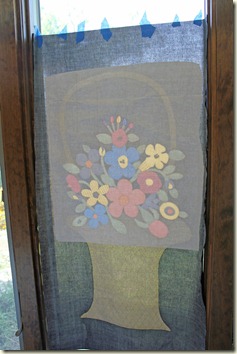
I used the FriXion marker to trace the outlines on the white interfacing and any other marks I wanted to stitch with bobbin work. This marker made a bright enough mark to see and heat will make it disappear. I have heard that the marks from these markers have been known to come back if the piece gets cold but since this will be then inside of my quilt it just won’t matter.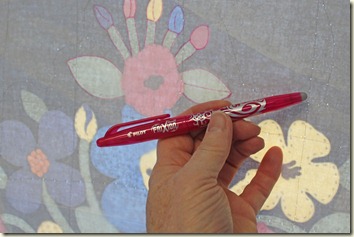
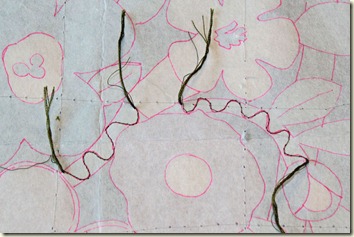
I wound bobbins with the 6 strand DMC embroidery floss for my bobbin work. Not a lot of floss will fit on each bobbin since it was so thick so had to fill bobbins pretty often. The top thread I chose matched the floss I was using for each part….green top thread with green floss, blue top thread with blue floss, etc. Matching the thread makes it invisible if it pops to the top.
I used a free motion foot on top and the second bobbin case I own for this machine in the bottom. I purchased the second bobbin case so I could adjust the tension on it when ever I wanted for heavier threads and keep the other bobbin case for regular threads. The tension screw had to be loosened quite a bit for this thick thread. I do have a tip for anyone doing adjustments on the screw on their bobbin cases. Put the bobbin case in a small plastic bag and do the adjustments while it is in the bag. From personal experience if that itty bitty screw comes out and drops or flies away you will have a dickens of a time finding it. The plastic bag will at least contain it. Another tip – if you do happen to loose it on the floor take all the pins off your magnetic pin cushion and pat the floor in systematic rows and you might be lucky enough to find it…I found mine that way once.
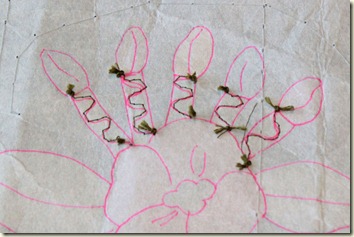
I started stitching following the lines on the stabilizer pulling the floss to the backside which is actually the side that is up when you are stitching bobbin work. Confusing I know, but remember the floss will be stitched to the front of the panel so the top thread is stitching on the back. It is hard to stitch and not know what it will look like until you turn it over but that is what you have to do. Try to make even sized stitches so the bobbin stitches will look nice when you are done…not an easy task but that is the goal. At the end of a line of stitching leave long tails on both threads and pull or using a large eyed needle bring the floss tail to the back. I tied the tails together to secure them on the back then trimmed the tails.
 To start, I pinned the water soluble stabilizer I had on hand to the back of the flower area then used the sewing machine to baste around the edge and in a grid across it to hold it in place. I would tell you what brand it was but don’t know as the label was gone. I do think any of the paper like water soluble stabilizers will work though.
Next I needed to get the position and shape of each flower, leaf, etc. transferred to this white interfacing. I didn’t want to mess with getting out my light box so just taped the sandwich to the window.

I used the FriXion marker to trace the outlines on the white interfacing and any other marks I wanted to stitch with bobbin work. This marker made a bright enough mark to see and heat will make it disappear. I have heard that the marks from these markers have been known to come back if the piece gets cold but since this will be then inside of my quilt it just won’t matter.

I wound bobbins with the 6 strand DMC embroidery floss for my bobbin work. Not a lot of floss will fit on each bobbin since it was so thick so had to fill bobbins pretty often. The top thread I chose matched the floss I was using for each part….green top thread with green floss, blue top thread with blue floss, etc. Matching the thread makes it invisible if it pops to the top.
I used a free motion foot on top and the second bobbin case I own for this machine in the bottom. I purchased the second bobbin case so I could adjust the tension on it when ever I wanted for heavier threads and keep the other bobbin case for regular threads. The tension screw had to be loosened quite a bit for this thick thread. I do have a tip for anyone doing adjustments on the screw on their bobbin cases. Put the bobbin case in a small plastic bag and do the adjustments while it is in the bag. From personal experience if that itty bitty screw comes out and drops or flies away you will have a dickens of a time finding it. The plastic bag will at least contain it. Another tip – if you do happen to loose it on the floor take all the pins off your magnetic pin cushion and pat the floor in systematic rows and you might be lucky enough to find it…I found mine that way once.
I started stitching following the lines on the stabilizer pulling the floss to the backside which is actually the side that is up when you are stitching bobbin work. Confusing I know, but remember the floss will be stitched to the front of the panel so the top thread is stitching on the back. It is hard to stitch and not know what it will look like until you turn it over but that is what you have to do. Try to make even sized stitches so the bobbin stitches will look nice when you are done…not an easy task but that is the goal. At the end of a line of stitching leave long tails on both threads and pull or using a large eyed needle bring the floss tail to the back. I tied the tails together to secure them on the back then trimmed the tails.
I really like the texture this adds to the panel. I have never done bobbin work on anything but a sample when I took a class one time. I think the hardest part was keeping the stitches fairly even and not to stop moving my hands while the needle was still moving. That is a sure way to make a lumpy spot in the bobbin stitching and of course those places had to be all ripped out and done over. I tried to start and stop in the same spot so no one would be able to spot the starts and stops where lines had to be joined. I still have a lot to learn to make my bobbin stitching perfect but I like my first real attempt.
I want to use this technique again as it was fun and sure adds a lot to the printed flowers, etc. on this panel. Until Later,
Lynn
Monday, April 2, 2012
Guild Challenge 2012
I know I said I wasn’t going to show you my guild challenge quilt until after we had our May meeting but think there might only be one gal that checks my blog and she stopped in one day and it was laying right where she could see it. If there are any other of my guild members reading this you can just not be surprised and look at the blog posts on this subject or just pretend you have not seen my challenge when I unveil it.
Here are the rules for this year’s guild challenge called Panel Magic. Before I list the rules I will explain what a challenge is for those that don’t know. Each year our quilt guild has a challenge to make a quilt following a set of rules. These rules change from year to year and sometimes the challenge requires a certain fabric be used too. Challenges are optional and you can choose whether you want to do it or not. When I get a chance to dig out my old newsletters I will share some of the other guild challenges we have had in previous years with you. (I have kept every newsletter since we started the guild over 20 years ago and if I can locate the rules I will share them…I know I am a pack rat!) The challenge is usually geared to make the members stretch their skills and imagination and maybe for them to try something new. My friend and I volunteered to be in charge of the challenge so we made up the rules and will oversee the unveiling in May – not too tough a job.
OK, now for the rules.
1. Choose at least one pre-printed panel for this challenge. this panel can be a large panel, block sized panels or stripe like panels.
2. You need to choose one or more other quilt fabrics to use on the front of the challenge piece.
3. you must do more than just quilt and bind your panel. Examples: cutting apart and adding other fabric, embellishments, applique, thread work, piecework, etc.
4. It can be either hand or machine quilted and must include a label on the back.
5. Keep your challenge a secret until the May meeting where they will be unveiled.
6. To receive your challenge gift, the challenge must be complete – quilted, bound, and labeled by the May meeting.
7. Have Fun!!!
As you see they are pretty open ended and everyone should be able to do what they want. A lot of quilters don’t know what to do with those pretty pre-printed panels so thought this would be a good challenge.
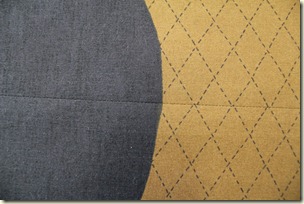
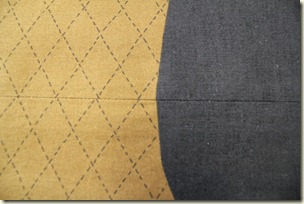
This is the panel I chose to work with for this challenge. I purchased it in Paducah last spring at the AQS show and two panels came in the one cut so have a before and after version. I say after, but even though I started my challenge last fall it is still not finished, but am hoping to get it finished this week or the next as there is not that much left to do.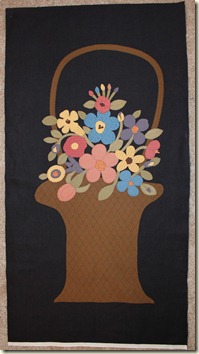 I didn’t like the basket being so tall so cut the panel and took out some of the length and seamed it together matching the black diamonds printed on the basket and the outside edges where the basket meets the black background. You can hardly tell the seam is there now. I pressed the seam open to distribute the bulk and make the seam more invisible.
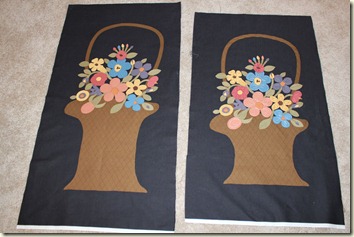
Here is a photo of the two panels side by side after I shortened the basket on the one. Didn’t think to take a photo of the shortened basket until after I did some other things to it but that discussion will have to wait until another day as I don’t have time to get the photos sized and everything written up today. I should have tacked them up on my design wall or another wall to get a straight on photo but was lazy and just laid them on the floor. You can still see the difference, right?
To me the flowers are more the center piece of the panel after I shortened it and the basket takes center stage when it is so tall. What do you think? Did I improve it by shortening it or should I have left it the same? Too late to do anything about it but would still like your opinions.
We are deep into our early spring weather here and now our apple tree is blooming, again a month earlier than it normally does. I have been trying to get last years debris cleaned out of my flower beds and get ready to spread the soybean mulch like I did last year. I wrote about it on the June 11, 2011 post. This year John bought some bales of soybean stems and leaves from a neighbor and had it ground when he ground hay for the cows. I have a huge pile to use. I really like the way the mulch behaved last year and with the strong winds we get here in Nebraska the one thing I wanted was a mulch that didn’t blow around out of the beds and the soybean mulch stayed put. I do need to add more to the beds this year as it does break down and decay but that is just adding nutrients to the soil.
I finally have both new computers working (I think) the way I like them and all the programs loaded on them. What a job! Guess there are a few things I need to tweak or research how to set before I am completely done though. They both work great but I would much rather keep working on something I already know how to use than take the time to learn something new. I can do it but it just takes so much time.
Will be posting several blog entries about the making of this challenge quilt so please come back to check it out.
Until Later,
Lynn
Here are the rules for this year’s guild challenge called Panel Magic. Before I list the rules I will explain what a challenge is for those that don’t know. Each year our quilt guild has a challenge to make a quilt following a set of rules. These rules change from year to year and sometimes the challenge requires a certain fabric be used too. Challenges are optional and you can choose whether you want to do it or not. When I get a chance to dig out my old newsletters I will share some of the other guild challenges we have had in previous years with you. (I have kept every newsletter since we started the guild over 20 years ago and if I can locate the rules I will share them…I know I am a pack rat!) The challenge is usually geared to make the members stretch their skills and imagination and maybe for them to try something new. My friend and I volunteered to be in charge of the challenge so we made up the rules and will oversee the unveiling in May – not too tough a job.
OK, now for the rules.
1. Choose at least one pre-printed panel for this challenge. this panel can be a large panel, block sized panels or stripe like panels.
2. You need to choose one or more other quilt fabrics to use on the front of the challenge piece.
3. you must do more than just quilt and bind your panel. Examples: cutting apart and adding other fabric, embellishments, applique, thread work, piecework, etc.
4. It can be either hand or machine quilted and must include a label on the back.
5. Keep your challenge a secret until the May meeting where they will be unveiled.
6. To receive your challenge gift, the challenge must be complete – quilted, bound, and labeled by the May meeting.
7. Have Fun!!!
As you see they are pretty open ended and everyone should be able to do what they want. A lot of quilters don’t know what to do with those pretty pre-printed panels so thought this would be a good challenge.
This is the panel I chose to work with for this challenge. I purchased it in Paducah last spring at the AQS show and two panels came in the one cut so have a before and after version. I say after, but even though I started my challenge last fall it is still not finished, but am hoping to get it finished this week or the next as there is not that much left to do.
 I didn’t like the basket being so tall so cut the panel and took out some of the length and seamed it together matching the black diamonds printed on the basket and the outside edges where the basket meets the black background. You can hardly tell the seam is there now. I pressed the seam open to distribute the bulk and make the seam more invisible.
Here is a photo of the two panels side by side after I shortened the basket on the one. Didn’t think to take a photo of the shortened basket until after I did some other things to it but that discussion will have to wait until another day as I don’t have time to get the photos sized and everything written up today. I should have tacked them up on my design wall or another wall to get a straight on photo but was lazy and just laid them on the floor. You can still see the difference, right?
To me the flowers are more the center piece of the panel after I shortened it and the basket takes center stage when it is so tall. What do you think? Did I improve it by shortening it or should I have left it the same? Too late to do anything about it but would still like your opinions.
We are deep into our early spring weather here and now our apple tree is blooming, again a month earlier than it normally does. I have been trying to get last years debris cleaned out of my flower beds and get ready to spread the soybean mulch like I did last year. I wrote about it on the June 11, 2011 post. This year John bought some bales of soybean stems and leaves from a neighbor and had it ground when he ground hay for the cows. I have a huge pile to use. I really like the way the mulch behaved last year and with the strong winds we get here in Nebraska the one thing I wanted was a mulch that didn’t blow around out of the beds and the soybean mulch stayed put. I do need to add more to the beds this year as it does break down and decay but that is just adding nutrients to the soil.
I finally have both new computers working (I think) the way I like them and all the programs loaded on them. What a job! Guess there are a few things I need to tweak or research how to set before I am completely done though. They both work great but I would much rather keep working on something I already know how to use than take the time to learn something new. I can do it but it just takes so much time.
Will be posting several blog entries about the making of this challenge quilt so please come back to check it out.
Until Later,
Lynn
Subscribe to:
Posts (Atom)

